Topic: Help me clean the mess.

Do you remamber about clean "that thing" underneath the icebox, after years of dust and dirt?
   Well, imagine something similar in a digital piano.

   I opened my old Roland Digital piano, to try clean contacts, but it's more difficult than I imagine. If someone in this forum had experience cleaning inside digital pianos and contacts, I would be glad if could give some tips for help.

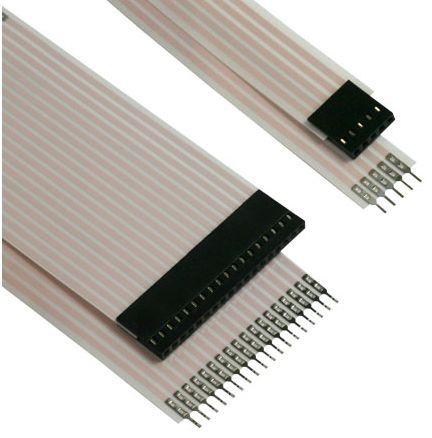
   At the momment I'm having problem with a tape cable, white delicate tape cable, that I need to remove before can reach the circuit where is the cont acts for the keys. The tape cable it's similar to this one :

PunBB bbcode test

   Too fragile, and the positon it's complicated, and the tape cable it's foled (originally) near the connection. 

   I will take and post some photos soon.

   I also need to know what product, solvent, I need to apply to clean the key contacts.

Last edited by Beto-Music (19-11-2020 14:54)

Re: Help me clean the mess.

Here's an article for you.

https://www.digitalpianoplanet.com/how-...tal-piano/

I suggest you use this:
https://www.worldofchemicals.com/542/ch...onics.html

Re: Help me clean the mess.

Thanks.

I'm puzzled about how remove the keys. On youtube videos it's easy for keyboards, but digital pianos looks different.

About the tape eletronic cable, I took a picture :


PunBB bbcode test

Key Fumbler wrote:

Here's an article for you.

https://www.digitalpianoplanet.com/how-...tal-piano/

Looks fragile and I'm afraid of ddamge while trying to disconnect it.

I suggest you use this:
https://www.worldofchemicals.com/542/ch...onics.html

Last edited by Beto-Music (19-11-2020 16:35)

Re: Help me clean the mess.

I managed to gentle remove the tape cable, and remove screws. This is the situation:

PunBB bbcode test

Dirty all over some areas.
I will buy a special spray used by profetionals to clean circuit boards.

How do I know if it's time to buy a new set of rubber contacts strip?
Maybe I should buy while they still manufacture sets that fit in my DP model, don't you think?

I confess I'm afraid of remove the rubber strip to clean the contact. It' feels so smooth, so fragile

Last edited by Beto-Music (19-11-2020 18:56)

Re: Help me clean the mess.

Beto-Music wrote:

I managed to gentle remove the tape cable, and remove screws. This is the situation:

PunBB bbcode test

Dirty all over some areas.
I will buy a special spray used by profetionals to clean circuit boards.

How do I know if it's time to buy a new set of rubber contacts strip?
Maybe I should buy while they still manufacture sets that fit in my DP model, don't you think?

I confess I'm afraid of remove the rubber strip to clean the contact. It' feels so smooth, so fragile

You need to substitute the strips only when the magnetic part stops working (meaning you get improper velocities like p instead of f or viceversa, no on-off contacts when playing). The type of spray is a good choice, another alternative is isopropyl alcohol because it evaporates faster. In any case avoid any type of liquid if it is not truly necessary. You need a little bit of caution with rubber strips not so much because they will tore to pieces but because they have miniscule heels that allows them to stick on the circuit board. Use some kind of tool to gently pull them off of their socket and you won't break anything. We've all been through this so good luck!

Last edited by Chopin87 (19-11-2020 20:43)
"And live to be the show and gaze o' the time."  (William Shakespeare)

Re: Help me clean the mess.

Thanks for the tips.

I think in buy a new set of rubber strip before they stop manufacture the series that fit for this and other old models. WHat if my strip works for 1 year, and when fail I discover there is no longer for sale?

The rubber heels I saw a tip in other video, where someone used a tiny plastic of a tiny cable, thin as a pin head.

What scares me now is tyhe key removal, needed to be repeated 88 times.

These videoas shows key's removal similar to the keys of my model :

https://www.youtube.com/watch?v=JbPGkZNDeAQ    (see at 2:00)

https://www.youtube.com/watch?v=9iKyY5g77jY  (see at 6:40)


I'm really afraid to broke a key while removing or while placing back...
I tried with a lot of care but it's not easy as a it looks in the video.

Chopin87 wrote:

You need to substitute the strips only when the magnetic part stops working (meaning you get improper velocities like p instead of f or viceversa, no on-off contacts when playing). The type of spray is a good choice, another alternative is isopropyl alcohol because it evaporates faster. In any case avoid any type of liquid if it is not truly necessary. You need a little bit of caution with rubber strips not so much because they will tore to pieces but because they have miniscule heels that allows them to stick on the circuit board. Use some kind of tool to gently pull them off of their socket and you won't break anything. We've all been through this so good luck!

Re: Help me clean the mess.

Quick update, good news, and bad too:

The Goods: I got the way to remove the keys, I removed 4. I think I will be able to clean everything if I manage to remove all key swith care, clean inside the metal frame and platic frame of the structure that holds everything, and clean each key on top, bellow, sides inner portion...
But I'm not sure if I can or if it's necessary to remove the hammers to clean everything nicely in the frame. Well... one step at a time...

The Bads: I never saw soo much dust & dirty in a small space in my whole life. Háa háaa... Ohhnn my... I will not post a picture since I don't want anyone here in this forum to get psychologic trauma.
Now I know how important is to have a lid or a cape to cover the piano, and how inportant it's do no not each animal crackers during breaks of piano practice or while on web, if you use your piano as speakers while watching youtube clips.

Ok, I have a cape to cover, but was always lazy to use it often.

Last edited by Beto-Music (19-11-2020 21:42)

Re: Help me clean the mess.

Sounds like you're doing a really good job and that it's going well.  Good work!

I'd recommend that you can clean as much as you can with a vacuum, compressed air, a hand blower, or canned air, since that will get the majority of the dust cleared up and you can do that multiple times without disassembling much and there's little or no risk of hurting anything.  A second line of defense is a dry microfiber cloth.  To clean up what doesn't get taken care of by compressed air or a microfiber, you can use water, lightly soapy water (a simple soap with very few added chemicals), or a mild and diluted all-purpose cleaner (I usually use 303 but anything a detailer would use for all surfaces would be fine); however, only do that if you must and use as little as possible (don't spray the cleaner directly on and don't immerse anything).  I often use q-tips or small cotton swabs to gently apply and then remove any cleaner like that, and after a few minutes (or in arid climates like mine--a few seconds), there won't be any moisture or humidity from the cleaning and the part can be put back.  As long as any part is completely dried quickly after cleaning, you won't have harmed any of the electronics.  It can take a lot of time and requires diligence and patience, but since the goal is to make a $500-2000 keyboard last for a few more years, it's well worth it.

Isopropyl alcohol and a few other more aggressive chemicals can be an option in select cases--like cleaning the key contacts, but be careful of the surfaces you use it on because it can dry or denature many plastics, rubbers, or synthetic materials--again it's best to start with dry cleaning and only do really dirty areas with anything else.  When working with key contacts, there is a substance coating the contact that--when a key is pressed--forms a small circuit (which is true in MIDI keyboards, calculators, remotes, computer keyboards, etc.) and as the key is pressed over time, the substance breaks down into a powder which can be cleaned to allow more time before replacement, but it eventually totally rubs off (or becomes enough of a different shape that it stops working), which is when replacement is needed.  The other way that key contacts can fail is if the rubber frame dries out and cracks in such a way that the contact no longer returns to its original shape after a key is pressed--in that case, I don't know of any other option than replacement.

Spotify: https://open.spotify.com/artist/2xHiPcCsm29R12HX4eXd4J
Pianoteq Studio & Organteq
Casio GP300 & Custom organ console

Re: Help me clean the mess.

I got a "Contact Cleaner" (word by word t ranslation of spray can products sold here to clean circuits boards):

Photo I took :

https://i.ibb.co/xspmStS/IMG-20201119-WA0034.jpg


Video of simlar product :  https://www.youtube.com/watch?v=Orv5Df-K4Zs

I want to know if this product can replace the isopropyl alcohol. It 's made of fluorinated solvents and isopropanol. Anyway this spray it's need to clean the circuit board, as there is some dirt sticked (look circuit board photo)

This can of 300ml it's the price of 50ml of isopropyl alcohol in my city.
If EvilDragon was here now, he would say: "Your city sucks."

Last edited by Beto-Music (20-11-2020 01:50)

Re: Help me clean the mess.

One ingredient in this circuit cleaner spray is isopropanol alcohol, and wikipedia says isopropanol it's the same thing as Isopropyl alcohol.The other ingredients in the spray is fluorinated solvents (evaporates 100% I think) and propelent gas (CO2 probably but I don't know).

I think it's logic presume all this ingredients evaporates with no residue.

Is it safe for the rubber strip contact?
I mean for the rubber itself and for the contacts inside the rubber and the small contacts in the circuit board area where the rubber strip fits.

In this video this brazilian used a similar spray to clea-up the contacts of the circuit board, but not at  the rubber strip and told to do not use in the rubber strip or the dark spots inside, but said to use a swab if needed to clean it:

https://www.youtube.com/watch?v=RiqTaitG4eo

Last edited by Beto-Music (20-11-2020 01:50)

Re: Help me clean the mess.

More good news, to remove the hamers it's just need to pull.

My Roland it's old but have progressive hammer action (heavier hammers to bass and going lighter to trebble), like shows the image bellow, it have 1 to 4 weigh number, being 1 the firt bass and the 4 the last trebble I removed :

PunBB bbcode test

The poiny of the hammer it's taller in the bass,(number 1) compared to trebble (number 4).

It have no scapment simulation. But many people find scapment pointless or find the scapment reproduction of digital pianos not convincing or not like the feeling of real pianos.

A  bit of touching momment. I realise many of the dust inside the frame was fur, animal fur. Fur from the pet cats who used top sleep over it, and 3 that had passed away. They used to jump over the keyboard when I was playing, like didn't agree I was giving attention to the piano and not to them. They jumped, laid over the keyboard, looked to me and meow.

Last edited by Beto-Music (20-11-2020 02:49)

Re: Help me clean the mess.

Fast update... Still researching.

I found a incoherence between two different videos:

-In one a person said to use Contact Cleaner Spray only in the circuit board after remove the rubber strip, and he sprays in the board even in the board's contacts, and instruct to clean the rubber strip with a swab.

-In other video another person said to do not use Contact Cleaner Spray even for the circuit board's contacts. He told it could damage the contacts.

I'm confused now.. Can I use the Contact Cleaner Spray or not??? Or at least used after remove the rubber strip?
Can it remove some of the graphite from the contacts in the circuit board, and so create potential damage?

A good caution tip I found is to keep the eye in the rubber strip holes, since each rubber contact have two holes, one deep and one shalow, and if we reverse the orther (upside dow one strip piece by accident) it will not gonna work.
I will try to keep that on mind.

Last edited by Beto-Music (20-11-2020 06:47)

Re: Help me clean the mess.

Do not use contact cleaner on the rubber.
Isopropanol will dry out the rubber so it will age faster. For the rubber strip you can use a mild dish soap in warm water . Let the strips stay in the soap for a while and use a soft brush to remove the dirt.

Contact cleaner should be fine for the contacts on the pcb, but I recommend starting with (distilled) water first. This won't harm the contact and will remove dirt. You can use the contact cleaner to remove the remaining dirt, but you should clean the contacts afterwards (just a dry cotton swab) because IPA will leave residues.

Beto-Music wrote:

Fast update... Still researching.

I found a incoherence between two different videos:

-In one a person said to use Contact Cleaner Spray only in the circuit board after remove the rubber strip, and he sprays in the board even in the board's contacts, and instruct to clean the rubber strip with a swab.

-In other video another person said to do not use Contact Cleaner Spray even for the circuit board's contacts. He told it could damage the contacts.

I'm confused now.. Can I use the Contact Cleaner Spray or not??? Or at least used after remove the rubber strip?
Can it remove some of the graphite from the contacts in the circuit board, and so create potential damage?

A good caution tip I found is to keep the eye in the rubber strip holes, since each rubber contact have two holes, one deep and one shalow, and if we reverse the orther (upside dow one strip piece by accident) it will not gonna work.
I will try to keep that on mind.

Re: Help me clean the mess.

I agree with MrRoland.  Contact cleaner should always be safe on electrical contacts but not necessarily on other surfaces.  Also some contact cleaners contain lubricants that will remain after the isopropyl alcohol evaporates to "improve conductivity" or make it easier to unplug something later, so don't spray too much if you use it.  I usually use something like Deoxit for all purpose cleaning of circuit boards if compressed air isn't enough, and I only use contact cleaner for just the metal surface of electrical contacts--especially if I've had electricity loss or signal loss.

Spotify: https://open.spotify.com/artist/2xHiPcCsm29R12HX4eXd4J
Pianoteq Studio & Organteq
Casio GP300 & Custom organ console

Re: Help me clean the mess.

Thank you both for the imput.

My Contact cleaner have no lubricants, I checked. I have other similar product with lubricants that also clean, enhance contact and remove some rust , but here it have a different name and not labeled as Contact Cleaner.

The product with lubricant I think about use in buttons,  On-OFF and instrument selections & features... but just after use the Contact Cleaner (no residual) itself. Since the lubricant left after evaporation may keep longer "contact helping effect" than the Contact Cleaner. Or can't the lubricant do that????
But No lubricant on key contacts anyway.

Ok, No Contact Cleaner in the rubber strip, and no isopropanol on rubber strip. :-)


I found some tips, and I would like to hear your opinion about :

Tip 1 : Use graphite powder (super fine powder) in the rubber strip dark contacts, since there is graphite there, to help get better contacts.

Tip 2: After clean the contacts in the circuit board, use a pencil, graphite pencil to replace areas with possible graphite loss, but be carefull to not close the circuit or the key will stay as pressed all the time.

Tip3: Clean the contacts in the circuit board with a rubber or pencil rubber, and then use isopropyl alcohol after it. Then Tip 2 would follow if needed.

Well, what aboput those tips?

MrRoland wrote:

Do not use contact cleaner on the rubber.
Isopropanol will dry out the rubber so it will age faster. For the rubber strip you can use a mild dish soap in warm water . Let the strips stay in the soap for a while and use a soft brush to remove the dirt.

Contact cleaner should be fine for the contacts on the pcb, but I recommend starting with (distilled) water first. This won't harm the contact and will remove dirt. You can use the contact cleaner to remove the remaining dirt, but you should clean the contacts afterwards (just a dry cotton swab) because IPA will leave residues.

tmyoung wrote:

I agree with MrRoland.  Contact cleaner should always be safe on electrical contacts but not necessarily on other surfaces.  Also some contact cleaners contain lubricants that will remain after the isopropyl alcohol evaporates to "improve conductivity" or make it easier to unplug something later, so don't spray too much if you use it.  I usually use something like Deoxit for all purpose cleaning of circuit boards if compressed air isn't enough, and I only use contact cleaner for just the metal surface of electrical contacts--especially if I've had electricity loss or signal loss.

Last edited by Beto-Music (20-11-2020 16:29)

Re: Help me clean the mess.

Graphite powder could help, but you could also use a remote repair solution like https://www.amazon.co.uk/REMOTE-RESTORE...B01M8LEOIV

I also use a rubber to clean delicate surfaces, but I never tried this on graphite or carbon contacts.

A pensil is conductive and this will increase the conductivity of the contacts, but it isn't very sticky so I imagine it won't last for a long time. Conductive ink might do a better job.

Last edited by MrRoland (20-11-2020 17:55)

Re: Help me clean the mess.

Thanks again. I only checked a few key contacts, and they look strong.

i t ested the COntact Cleaner on some buttons that had bad contact, and some that no longer worked. Most back to work or got better contact. But How long it will last?  One button that was long unworkeable got back to work. Other not so long unworable took more spray shots to ge back, but still need some presure to work, and it got back once today but lost again, and now after more spray shots (with tiny noodle very directed to the inside of the eletronic button andnot the exterior plastic dome) it's working again.

Should I use the the other spray I have, the version with lubricant, just for this or all the buttons? Do such lubricants in such sprays last long to protect against rust and too improve contact?

By the way, I tested the contact cleaner (no lubricant version) on the circuit board, and despite nice clean some areas, there are areas with solid glued dirty, and some green line (circuit fine tiny lines) that are dark inead of green. Afer many spray shot just a small portion of the dark areas got a little green again, wth help of cotton swab.
I think this dirty it's vegetable milk, once spilled on the DP keaboard by accident.

Do it need some soap+water solution applied on the cotton swab to remove it, delicately?

Two casualities: Two key bars (white plastic) got hurt while removing the keys the way a youtuber showed. One got a tiny crack that it's not relevant, but other will need some glue. The glued key will be placed in deep bass or deep trebble, areas not often used. After this incident I used a hair drier to warm the plasctics of the keys that was not easy to remove, and after it warm a bit I managed to remove without problems. I also removed all hammers.

MrRoland wrote:

Graphite powder could help, but you could also use a remote repair solution like https://www.amazon.co.uk/REMOTE-RESTORE...B01M8LEOIV

I also use a rubber to clean delicate surfaces, but I never tried this on graphite or carbon contacts.

A pensil is conductive and this will increase the conductivity of the contacts, but it isn't very sticky so I imagine it won't last for a long time. Conductive ink might do a better job.

Last edited by Beto-Music (20-11-2020 20:30)

Re: Help me clean the mess.

Graphite is made for drawing not contact strips.

"And live to be the show and gaze o' the time."  (William Shakespeare)

Re: Help me clean the mess.

I masked the rubber strip area before apply the Contact Cleaner.
Not ready yet, as there is other dirt need to remove, that require remove the rubber strip. See results :

BEFORE:

PunBB bbcode test


AFTER:


PunBB bbcode test


As you can see, some lines are still dark in some portions I cleaned 4 times.
A person who works with electrical system and some electreic circuits told me that if Contact Cleaner can't remove it after manys cleaning tries, with cotton swab together, it may worth try paint thinner carefully or acetone, with cotton swabs, in such specific areas of dark lines.

I'm very afraid to use acetone or paint thinner, and it remove the entire circuit lines instead of just remove these dark stains on it (oxidation???).

Some pictures of the DP after remove keys and hammers:

PunBB bbcode test


Hammer:

PunBB bbcode test


Interestinmg video. Maybe I need such repair, but need to test to be sure. I hope in my city there is someone able to do this kind of repair, in case I need :

https://www.youtube.com/watch?v=ref9JHUf-uw

Last edited by Beto-Music (21-11-2020 15:01)

Re: Help me clean the mess.

I bought a rust remover, but not for the circuits or contacts, but for some of the metal structure of the frame who holds pices.

Today I got a plan B, if needed. I found 3 blocks from my home a small mobile technical assistance able to performe circuit repair on cell phones. There are very few on the city with such precision skills and tools for such small circuits. My Roland circuit lines it's surely not thinner than the ones from cell phones, so I think they could fix my circuit board if my cleaning do not come to solve the problems.

I my DP circuit need such precision repair, the technical from the musical organ&keyboard technical assistance, will have not such precision tool. There is only one in the city for digital instruments repair, but he probably can't repair very small circuits lines.
So, in case of need circuit board advanced repair, I still will need to reassemble everything to ge my DP in fine shape again, with all keys working well.

Re: Help me clean the mess.

Sounds like a good plan.  Also, giving parts those rusted parts of the frame a 24-48 hour white vinegar bath and a wire brush scouring is also a viable alternative for rust removal if your purchased one doesn't clear it up for you.  While I haven't used that approach on a digital piano, it comes in handy when trying to save badly rusted antique tools that there's not other hope for--even the left outside for 50-75 years years and nobody wants them variety.

Just keep to your plan of starting out with the least aggressive solution and working up from there, and this project should continue to go splendidly.  From the photos you're already making excellent progress.  Also, remember that anything that is improved buys you more time before replacement, you may not necessarily need to get to 100% Like New and instead will have perfectly working results getting it 70-80% of New.

You're doing a great job, and best of luck as you continue!

Spotify: https://open.spotify.com/artist/2xHiPcCsm29R12HX4eXd4J
Pianoteq Studio & Organteq
Casio GP300 & Custom organ console

Re: Help me clean the mess.

Thanks tmyoung.

The rust remover I bought it's not exactly what I thought, since it's in reality a rust converter, since it do not remove the rust but claims to convert it into a anticorrosion layer similar to a primer, and it looks dark after dry. When the seller told me I imagined it would remove the rust and bring back the metal color with a some protection against new corrosion. And the worst is that it only convert rust if it's a very thin rust layer and not in deeper rusted areas.

Wasted money? Whould I use it, since the metal frame is inside and not visible after assemble?
Anyway with rust converter or with rust remover, I will need to sandpaper many rusted spots that are not thin.

tmyoung wrote:

You're doing a great job, and best of luck as you continue!

Re: Help me clean the mess.

The rust converter is usually used after removing most of the rust with a wire brush.
The converter takes care of the deeper layer.
It becomes black indeed when the rust is converted, which of course isn't what you want if things are visible after reassembling.
But I really don't care when I don't see the black spots when finished.
Contact cleaner will keep your switches working for a while, but they will fail again.
I recommend replacing the switches.
I don't know how many switches your control panel contains, but I had all switches of my Roland F30e replaced within the hour. They were quite easy to desolder and solder.
Black traces on a pcb are bad. The copper is definitely damaged by the solution that has been on the pcb. Only way to stop this without bridging the damaged parts with wire is to remove the green soldermask with a glasfiber brush and use the same brush to clean the traces. If you are lucky the copper layer isn't completely gone and you can put a thin layer of solder on the traces. This will protect them and ensure that they will conduct properly.
If the traces are badly damaged, the should be bridged with patchwire (thin copper wire with  a protective coating).
A skilled technician can repare pcbs which are in a far more worse condition than yours, so don't give up. It's a great learning experience ;-)

Beto-Music wrote:

Thanks tmyoung.

The rust remover I bought it's not exactly what I thought, since it's in reality a rust converter, since it do not remove the rust but claims to convert it into a anticorrosion layer similar to a primer, and it looks dark after dry. When the seller told me I imagined it would remove the rust and bring back the metal color with a some protection against new corrosion. And the worst is that it only convert rust if it's a very thin rust layer and not in deeper rusted areas.

Wasted money? Whould I use it, since the metal frame is inside and not visible after assemble?
Anyway with rust converter or with rust remover, I will need to sandpaper many rusted spots that are not thin.

tmyoung wrote:

You're doing a great job, and best of luck as you continue!

Re: Help me clean the mess.

Thanks for the nice words.  :-)

I got concerned about the rubber strip (what is the formal name of it?). I removed just a small portion in the area the liquid spilled and the PCB was more damages. And to my surprise, the area underneath the rubber strip, the contacts and small cicruit area there, was clean and good looking as new. No deffect or dirty my eyes could spot.
That's because the rubber strip have a area in the sides (like a railroad) glued in the PCB. The portio of rubber I removed I managed to fit it again, but after fit the glue effect no longe it's there, and if I do a little tinny finger pressure there, I an see the edges of the rubber raise a bit.

So, unless I find the same glue to apply again, the rubber strips will be not as well protected as before. So thr question is:

"To clean or not to clean the ubber are contasts?"

Do it need to be clean, if even the area where the spill milk accident happened was super clean and new???
How coulde had gone inside the other areas I didn't checked, if the worst area of accident was looking perfect inside?

If I manage to remove the remaining rust, and the circuit board works for all piano keys, what product should I apply to avoid new future oxidation in thses specific areas? A acrylic varnish?

I'm puzzled how it oxidazied, if the PCB have a layer of plastic or varnish covering it. How water got there through the layer and reached the copper???

MrRoland wrote:

A skilled technician can repare pcbs which are in a far more worse condition than yours, so don't give up. It's a great learning experience ;-)

Last edited by Beto-Music (22-11-2020 15:01)

Re: Help me clean the mess.

Bad news : I fited just the sensor bar again, without reassemble the entire piano with plastic keys and hammers, and found there are still notes not working, despite extensive cleaning. The oxidation was too advanced in the mentioned points.

But I sent photos to the skilled technician who fix cell phones and tablet's circuits, and he told the traces/lines need 0,01mm copper wire, to replace the lines, to be fixed. He said he can try.
I think it's a work they do mith microscope and precision tweezer, since only 2 technicians in  the city do such precision work.

I found Roland did something weird with this F-90 series. The rubber strip it's not just atached by rubber pins in small hole, but it's also glued. Look this photo :

PunBB bbcode test

This is the area where most of the soy milk poor on, but the contacts inside, beneath the rubber strip, are perfectly clean. And we can see the trail of glue seeling everything (util I remove the strip).

This other photo shows the glue wasn't part of the rubber strip, but applied as two trails in the circuit, above and bellow th contacts, as we see it even after the rubber strips ends (near right edge of circuit boarder).

PunBB bbcode test

If it's sealed, protected even from soymilk liquid in the worst afected area, why whould I remover all the other rubber strip, if all the strips are very well sealed?

Is that often in Roland digital pianos, to seal the rubber strip with the PCI, to avoit dust infiltration on the contacts?

I will not remove the rubber to clean contacts, since they are surelly clean, as the worst scenario area of  damage had clean contacts, thanks by sealed rubber on board. The small portions I removed, do not get sealed after fit it again (fit rubber pins in the small holes).

Do you agree with me???

Last edited by Beto-Music (23-11-2020 16:32)
Re: Help me clean the mess.

You've detailed it thoroughly.  Yes, there could be a few keys somewhere in the piano that have contact loss (most wear-and-tear of contacts will occur on the middle octaves of the instrument since they get played a lot more), but I doubt you'll get much of an improvement.  You're wise to focus on the circuit boards that have lost wiring.

I'd agree that you don't need to clean the contacts at this point.  Maybe down the road you'd need to clean or replace them, but if liquid made into the circuitry enough to corrode the copper and break connections on the boards, that's a hundred times more problematic than a couple of aging contact pads.  Your plan to do as little as possible until you're certain otherwise is very wise.

Spotify: https://open.spotify.com/artist/2xHiPcCsm29R12HX4eXd4J
Pianoteq Studio & Organteq
Casio GP300 & Custom organ console

Re: Help me clean the mess.

A complete new set (for 88 keys) of rubber strip it's quite pricy, I checked. I hope mine it's fine in all keys since, as you said, it can haver wear and tear, despite be clean and sealede from outside dust.
I hope, in case some contacts have problems, some product can rejuvenate it, as one in a link posted.

At the moment I removed the metal frame & plastic that holds the hamers and the plastic keys. But the metal frame its connected to the plastic frame in such way, that looks completely impossible do desassenble. I removed all screws, but it's of no help now, since the way metal and plastic are together looks impossible so split.

I would like to remove the plastic frame from the metal frame, to be able to better clean rust areas of metal and apply rust converter.

By the way, the technician who do micro soldering & repair workon cell phones and tablets, asked me what is the current in the circuit of key contacts. I don' know, but I supose it's low. Do you have a idea about?

tmyoung wrote:

You've detailed it thoroughly.  Yes, there could be a few keys somewhere in the piano that have contact loss (most wear-and-tear of contacts will occur on the middle octaves of the instrument since they get played a lot more), but I doubt you'll get much of an improvement.  You're wise to focus on the circuit boards that have lost wiring.

I'd agree that you don't need to clean the contacts at this point.  Maybe down the road you'd need to clean or replace them, but if liquid made into the circuitry enough to corrode the copper and break connections on the boards, that's a hundred times more problematic than a couple of aging contact pads.  Your plan to do as little as possible until you're certain otherwise is very wise.

Last edited by Beto-Music (24-11-2020 20:40)

Re: Help me clean the mess.

What the current draw, etc. usually varies from manufacturer to manufacturer and from model to model.  Your best bet to answer that question is to find a diagram like this one which gives a circuitry "map" in standard electrician-speak that will tell him exactly what each wire/thread/cable/connector is doing.  If you do enough searching online for the model, I'm sure you'll find the kind of thing he'll need to make the repair and it should make his work a lot easier and faster and result in a better repair.

https://i.imgur.com/bu9faD7.png

I'd advise against trying to separate the plastic and metal frame.  Often those things aren't designed to dismantled and then you will have bent, cracked, or shattered plastic which won't ever go back together again.  I'd cover the plastic with tape and plastic sheeting (plastic bags, saran wrap, anything like that can be improvised to work), and then you can resurface the metal (dry sand, wet sand, spray coat, etc.) without hurting the plastic.  As long as the metal sheeting isn't too thin to take aggressive cleaning, you really can't hurt any plastic that's taped off or sufficiently covered or any of the metal you're working on: that's how detailers and body shops handle repainting or resurfacing car metal, they cover and tape off the plastic headlights, rubber gaskets, and glass and then they can work as much as they need on the metal sheeting of the car.

I would also guess that your rubber contacts are fine based on the ones you showed.  In my experience the rubber surround tears before the contact pads wear off, and if anything was torn, you'd have seen it already (that kind of damage is very obvious); so, odds are very low that there's anything wrong there.

Spotify: https://open.spotify.com/artist/2xHiPcCsm29R12HX4eXd4J
Pianoteq Studio & Organteq
Casio GP300 & Custom organ console

Re: Help me clean the mess.

Manufactuers are jokers... Háa háaa
Why they added dozens of screws there if the frame and plastic can't be dismantled?

Here a couple pictures of the most liquid spill damage to the metal frame:
https://ibb.co/3sHm2H3
https://ibb.co/NFDfwyX

I will need to get some pieces of wood or something to add sandpaper in the point/head, to be able to thin this rust and then apply rust converter.

About the keys and the areas where key balance touch the frame, I will need to buy this "white grease" past lubricant, since many keys and where keys touchs, will need to clean some dust/dirt and there is dirt in the white grease.

I couldn't find circuit plans for Roland F-90 on web.

tmyoung wrote:

What the current draw, etc. usually varies from manufacturer to manufacturer and from model to model.  Your best bet to answer that question is to find a diagram like this one which gives a circuitry "map" in standard electrician-speak that will tell him exactly what each wire/thread/cable/connector is doing.  If you do enough searching online for the model, I'm sure you'll find the kind of thing he'll need to make the repair and it should make his work a lot easier and faster and result in a better repair.

https://i.imgur.com/bu9faD7.png

I'd advise against trying to separate the plastic and metal frame.  Often those things aren't designed to dismantled and then you will have bent, cracked, or shattered plastic which won't ever go back together again.  I'd cover the plastic with tape and plastic sheeting (plastic bags, saran wrap, anything like that can be improvised to work), and then you can resurface the metal (dry sand, wet sand, spray coat, etc.) without hurting the plastic.  As long as the metal sheeting isn't too thin to take aggressive cleaning, you really can't hurt any plastic that's taped off or sufficiently covered or any of the metal you're working on: that's how detailers and body shops handle repainting or resurfacing car metal, they cover and tape off the plastic headlights, rubber gaskets, and glass and then they can work as much as they need on the metal sheeting of the car.

I would also guess that your rubber contacts are fine based on the ones you showed.  In my experience the rubber surround tears before the contact pads wear off, and if anything was torn, you'd have seen it already (that kind of damage is very obvious); so, odds are very low that there's anything wrong there.

Last edited by Beto-Music (25-11-2020 23:55)

Re: Help me clean the mess.

You're looking for a "Roland F-90 Service Manual" and I can't find any online for sale or download either at the moment.  I'd recommend posting to the PianoWorld forum asking specifically about the circuitry of the F-90 and that you can't find that service manual, because somebody there is bound to know the answer or have a copy of that service manual.

White lithium grease lubricant sounds like a good choice for this, I use it a lot, and it should work well.  It's easy to spray/apply too much, so start with a little bit and slowly add more if needed.

Spotify: https://open.spotify.com/artist/2xHiPcCsm29R12HX4eXd4J
Pianoteq Studio & Organteq
Casio GP300 & Custom organ console

Re: Help me clean the mess.

Thanks. I need create a account in PianoWorld.

About lubricant, on Pianoworld a person told white lithium grease made keys stick after many years. Someone there suggested teflon lubricant.

No tutorial or image from web shows a roland with sealed (glued to the circuit board )rubber strip to avoid dust get inside. Until now only my F-90 have it as I saw. And it's too well done, perfectly applied, symetric, to look like a job ma de  by some technical assistance. It's weird exclusive sealed rubber

tmyoung wrote:

You're looking for a "Roland F-90 Service Manual" and I can't find any online for sale or download either at the moment.  I'd recommend posting to the PianoWorld forum asking specifically about the circuitry of the F-90 and that you can't find that service manual, because somebody there is bound to know the answer or have a copy of that service manual.

White lithium grease lubricant sounds like a good choice for this, I use it a lot, and it should work well.  It's easy to spray/apply too much, so start with a little bit and slowly add more if needed.

Re: Help me clean the mess.

If you can go with Teflon (PTFE), definitely do that.  White lithium grease is usually best for heavy-duty applications like garage doors where a lot of metal is touching a lot of metal, and white lithium is pretty good at repelling dust problem but it does "gum up" over time.  Silicone based/teflon lubricants are my go-to for anything else, especially hinges, and it makes especial sense since you're inside a small space where there isn't a lot of pressure.  PTFE is the best all around (except for machinery, etc.).  I was going to suggest PTFE, but I thought White lithium was the only option.

You can leave the rubber contacts that have been pulled away "floating" in place, or you can use a very small amount of a light rubber to plastic adhesive to reseal it.  You might even be able to gently apply enough pressure to it for it to stick again.  I'm guessing that the used some sort of "ribbon" of double-sided adhesive applied by a machine, and then the contacts were placed on top of that either by hand or by machine, which is why the adhesive strip continues to the very edge of the circuit board.  I don't know exactly what product would be best for that.

Spotify: https://open.spotify.com/artist/2xHiPcCsm29R12HX4eXd4J
Pianoteq Studio & Organteq
Casio GP300 & Custom organ console

Re: Help me clean the mess.

The technician is good. He fixed a relative's cell phone circuit, that had two frontal buttons not working, and phone body overheating while using or charging battery, and now it's working as new. I got the phone today, after the repair.

The Roland F-90's circuit lines it's not as tiny as cell phone lines, but have many circuit lines oxidated. His working table, with microscope and tools, it's made for cell phone and tablet circuits, and since the DP keys circuit it's long, he will need to adapt something to have better fixation of the circuit. I suggested some styrofoam strip pieces (in both sides) in the same level of the support of the circuit, and some tape, to help hold well. It's very important to the circuit board stay very firm for such delicate work.

I'm a bit concerned. I think the rest his arms or hands in such area, as it also nedsd to be firm for such work, in the sides of the working table circuit holder, and it's possible this space will not be as free as before, if he place a wide piece as the DP keys circuit board.

Last edited by Beto-Music (28-11-2020 00:13)

Re: Help me clean the mess.

An update of my odyssey:

-The cell phone technician who fix PCB told me the work would take too much time for hin, and he could not do it for me. My PCB was also way longer than his cel PCB stand in his working table with microscope. He recommended a friend with similar technical skill for PCB repair in tiny circuits of cell phone. There are just two in the city that do it, delicate tiny line repair, as long as I know, and his friend is the second one.

-This second guy accepted, as he had some experience with other eletronics and not just cell phone's PCB. But the price was a bit high. Well, considering the price of a modern equivallent of Roland, fix it would cost maybe 1/20 of price of buy a new one. Probably worth to fix.

-I found other technical assistance, one who fix organs and digital keyboards in my city, but they do not recreate oxidated tiny lines on PCB.

-Then a I found another digital keyboard & organ technical assistance, but not in my city, and he told me that fix tiny lines in PBC it's routine for them. He send me a video of one PCB line repair. Unfortunately I didn't liked what I saw, since looked like tin alloy repair, instead use 0,1mm copper wire, and it wasn't very precise. My PCB have a deffect that it's in 5 tiny lines or more together, one very close to another, difficult. I asked about prices but I probably will not accept.
Shipping on Brazil it's a absurd. Even if I send just the PCB it will have some cost, plus shipping back. He said that it's better to send the whole keyboard to be able to test, after fix PCB lines. But it's heavy (27kg / 59,52 pounds), it such shipping may cost close to the PCB repair.
They once in a while in the year trip to my city to get work repair here, but it may take months to they get here again.

Suggestions???
By the way... What glue should I use to fix a cracked white plastic key? It cracked in the top, where it fit to the metalic pin holder.

Last edited by Beto-Music (08-12-2020 22:33)

Re: Help me clean the mess.

Beto, amazing thread. I've taken broken phones to be repaired, and they just want to replace nearly the entire phone. Ends up costing 3x more than the value of the 2-yo phone.

But in that vein, I didn't notice if getting a new / replacement PCB sent out from Roland (or various service center) is possibly an option?

At least in the end, you will be an expert in such refurbishments!

Re: Help me clean the mess.

Well, it's very old, I bought already used many years ago. Unless some newer models use a very similar key contacts circuit board, also workable for this of mine, I suppose they no longer have how replace it by a new set.

The fact I performed disassemble and cleaning, probably will reduce the cost, compared if I would let them performe everything. Anyway in my city the service able to open and clean digital pianos do not fix PBC tiny lines, and the technician able to perform tiny PBC do not open or clean digital music instruments.

Sometimes I feel I'm in a pseudo jungle.

Edited: I researched about prices of similar (but not up to use in my DP) Roland DPC for key contract, and just one board (it's 3 in general) would cost similar to the repair of my boards with the technician who fix cell phone PCB. So, even if I could find a so old key contact circuit board to fit to my DP, the price of 2 (one of mine it's almost intact with just a dark dot in a line) or 3 boards woud be considerable more than repair it skilled technician .

I felt I need to replace some buttons like that bellow, but a lot of contact cleaner and press in press out, in about 3 days, fixed all (at least for some time, maybe months) to work almost perfect or perfect (most buttons):

PunBB bbcode test

houston wrote:

Beto, amazing thread. I've taken broken phones to be repaired, and they just want to replace nearly the entire phone. Ends up costing 3x more than the value of the 2-yo phone.

But in that vein, I didn't notice if getting a new / replacement PCB sent out from Roland (or various service center) is possibly an option?

At least in the end, you will be an expert in such refurbishments!

Last edited by Beto-Music (09-12-2020 00:10)

Re: Help me clean the mess.

A TRICKER SELLER TRYING TO RAISE PRICES?????

I saw this announce, but it was for Roland RD-700 and RD-700SX. But I noticed the photo look very much like my PCB of Roland F-90, despite my have rubber strips in grey. Price: 904 brazilian reals.

https://produto.mercadolivre.com.br/MLB...d700sx-_JM

Photo : PunBB bbcode test


Then I asked hin if he had key contact boards for F-90, and he said that have (last in stock he said), and then posted this announce minutes ago:

https://produto.mercadolivre.com.br/MLB...nd-f90-_JM

Photo: PunBB bbcode test

Looks the same photo of his first announce, but the price now it' 1199 brazilian reals.

I'm suspecting the PCB for key contacts in Roand F-90 and Roland  RD-700 are the same, and the seller put the same product in an9other annouce and raised the price by 33%.

How can I found out if Roland F-90 and RD-700 & 700Sx share the same key contact boards?
If I confirm it's the same for these models, the seller it's trying to raise prices, make me of fool.

Now, after I told hin the photos are the same, he explained me (or tricked me) that the connectors are different, not compatible.

Too much coincidence... Same photo, he said it was the last in  stock (to hurry me???), higher price...

Last edited by Beto-Music (09-12-2020 01:46)

Re: Help me clean the mess.

SOLVED... With my contact board in hands, and watching this video of a Roland RD-700 repair, I saw the contact circuits are similar drawing to the one of my F-90, but the connections, between one board to another, are indeed different (different positions).

https://www.youtube.com/watch?v=1Z_pYY129Ew

Or am I wrong?
I judge based in the  black vertical line with silver squares on top and botton. The circuit of my F-90 are look like but the board of my F-90 have the black vertical line in the left side, and not in the right side like the video.

But I bet the seller put a high price intentionally, since I was looking for a specific model.

Last edited by Beto-Music (09-12-2020 02:13)

Re: Help me clean the mess.

I registered in Roland of Brazil Website, and sent a question, asking if the contact board of Roland RD-700/700sx also works on F-90,a s the circuit drawing looked identical to me.
I will find out if the seller is tricker or not. Anyway he dropped the priceof F-90 board from 1200 reals to1000, after I said it was too expensive, anyway the board for RD-700 was just 904 reals.  But I'm not sure yet if it's the same board or not.

The organ/keyboard technical service from other city charges 380 reals for repair just the PCB lines (plus shipping), and use tin alloy and looks not precise. The second cell phone/tablet high precision technician dropped from 450 to 400 reals if I pay in cash, and he uses microscope and 0,1mm copper wire to reapir PBC lines, and it's from my city. So I prefer a precise microscope work than a bad look tin alloy work.

Should I buy new, if the seller it's not a tricker (will find out as soon Roland explains)? Or should I fix it for less than 50% of the price of a new set with rubbers included?
I also asked Roland of Brazil if they sell contact circuits, so I can compare prices. But maybe they cell just for technical assistance services. If is the case I can ask a technical service to tell me how much they charge to get it from ROland and sell to me.

It's becaming a novel... :-)

Last edited by Beto-Music (09-12-2020 14:54)

Re: Help me clean the mess.

Wow! I've been following this thread since the beginning. As a now long retired electronics technician, my recommendation is to replace the boards if you can. Given the size of components and circuits these days, or about the size of ants and ant legs, I no longer make repairs myself because I no longer have the motor skills and the eyesight to make a successful repair, but it was a rewarding job troubleshooting and repairing circuit boards when I could do it. The alloy color you saw with the soldering of the copper wires is normal. Solder is in fact a silver-colored material and there is no masking material placed over the solder-joints.

The cost may seem high, if you can get them at an acceptable price, however, look at it this way the amount of time spent cleaning, repairing, and risk of additional damage, is a lot more than what it cost to replace the boards in the long run. This is called the return on investment, or ROI and basically boils down to how much you spent versus how much you'll get out of it in the end. In this case, it's a matter of how much the repairs and faffing around cost you timewise and money-wise compared to a new board that will work right off without worry if the parts are going to hold up.

The issue I see is that the repaired boards may work for a while, but there are circuit traces inside the boards as well that may have cracked. What this means is that your surface repairs will fix those torn traces, but where the surface traces connect to the various pins and holes, there could be other cracks and broken traces inside and with playing and circuit board flexing the other traces will crack inside the board. With issues like this, you'll forever be tracing, troubleshooting, and never, ever, ever repair the problem 100%.

One more note regarding electronics. Never use a household vacuum cleaner to suck out the dust and dirt. A household vacuum cleaner isn't grounded and that can cause static electricity to zap your electronics inside the digital piano. This goes for computers too. The recommendation is to use canned air, or for a more-eco-friendlier approach use a "Rocket-Blaster" type bulb. You can find these at a photography store, or on the web such as at Amazon or B&H photo. They cost about $10 US for these and they work well.

Last edited by jcitron (09-12-2020 20:43)

Re: Help me clean the mess.

Thanks Jcitron

One white key got a deep crack near the pivolt point. What glue should I use? Superglue? Is it wise to glue it before put in place, let dry after connect and add another layer  of glue after dried?

The rubbers look ok. The cell phone technician for micro circuit repair said that apply a resin over the fixed area for protection, and use 0,1mm copper. I presume it's better than use tin allow soldering to trace lines. He can't check here in my roland F-90 in my home, but can check if current pass in her repaired line, using a multimeter.

Roland of Brazil was a mess, of little help. They just sent me a link for authorized technical suport bussiness on my state. I contacted one but this one recommended me another Roland authorized technical bussines for buy new pieces. I will talk with the reponsible guy tomorrow. Let's see if they have better price for the new set (with rubber strip together).
I'm considering the possibility of buy a new set like you said.

I was thinkig about let the micro circuit technician repair just one PCB, and test it, to see if works, and then if fine let hin fix the others. What PCB do you recommend me to sellect for this test?
Center, left or right should I choose?

Is that possible to a circuit line deffect in one PCB affect the keys of the other PCB, since the PCB bellow keys are connected one to another?

jcitron wrote:

Wow! I've been following this thread since the beginning. As a now long retired electronics technician, my recommendation is to replace the boards if you can.

Last edited by Beto-Music (09-12-2020 21:52)

Re: Help me clean the mess.

Beto-Music wrote:

Thanks Jcitron

One white key got a deep crack near the pivolt point. What glue should I use? Superglue? Is it wise to glue it before put in place, let dry after connect and add another layer  of glue after dried?

The rubbers look ok. The cell phone technician for micro circuit repair said that apply a resin over the fixed area for protection, and use 0,1mm copper. I presume it's better than use tin allow soldering to trace lines. He can't check here in my roland F-90 in my home, but can check if current pass in her repaired line, using a multimeter.

Roland of Brazil was a mess, of little help. They just sent me a link for authorized technical suport bussiness on my state. I contacted one but this one recommended me another Roland authorized technical bussines for buy new pieces. I will talk with the reponsible guy tomorrow. Let's see if they have better price for the new set (with rubber strip together).
I'm considering the possibility of buy a new set like you said.

I was thinkig about let the micro circuit technician repair just one PCB, and test it, to see if works, and then if fine let hin fix the others. What PCB do you recommend me to sellect for this test?
Center, left or right should I choose?

Is that possible to a circuit line deffect in one PCB affect the keys of the other PCB, since the PCB bellow keys are connected one to another?

jcitron wrote:

Wow! I've been following this thread since the beginning. As a now long retired electronics technician, my recommendation is to replace the boards if you can.

I don't know what plastic they use. Talk to the Roland tech, or another piano technician about the key. They should recommend the kind of glue needed. The problem is if the wrong glue is used, it will either not stick at all, which is a good thing, or worse it could melt the plastic and destroy the key completely. I had that occur with something else, not a piano key, and i ruined the item with the glue which turned everything into mush.

Your PCB technician is doing it the right way. The epoxy or resin over the repaired areas will prevent things from landing on the surface and shorting out the connections. In my old days as a tech, we would use some green gloopy stuff for that. I don't remember what it was called, but it looked similar to the stuff on the circuit boards I repaired. This may be because this was a commercial product and the company wanted the boards to look right.

It is possible for things to not work inside the circuit board. Let me explain. The circuit boards are no longer single-sided, meaning like the very olden days circuits were only on one side with the components pushed through and soldered to the pads. This is still used for simple things, but for more complex circuits, such as computer motherboards and digital pianos, they need to fit a lot more circuits in a smaller space. What this means is there are circuits inside the board as was well as on the surface, and on top of that, there are layers upon layers of circuit paths all over. Multilayer boards can be a few mm thick with various traces going every which way as needed.

The problem is when there's a crack or pull, there's a possibility that the crack has affected more than the top-most or surface circuits. I have seen multilayer boards with no apparent problem, but due to flexing the board inside the computer case, very fine cracks occurred on the inside of the layers causing weird things to happen such as intermittent failures. With ripped circuits, it's possible that the interconnections between the layers is damaged when an upper layer is torn. Remember, these circuits are only 1/2 mm thick if that and are very delicate.

With that said, I would as you say here talk to the Roland tech about this. He can recommend what to do, hopefully with this and the broken key. I wish you a lot of luck with this.

Re: Help me clean the mess.

Thanks again Jcitron
I can't find what type of plastic are the white keys made of.

The key contact PCB looks tiny in details but also looks simple, just lines on one side and resistors on the other side, plus the contacts of graphite underneath the rubber strip. I don't believe it have multiple layers, but I will ask Roland or a authorized assistance about it.

I found the seller, of the link announce of contact border for sale, it's tricker. He said minutes ago that the announce it's just for the rubber strip and not for the PCB key contacts. So why he posted photo of the circuit and not just for the rubber strip??? 

https://produto.mercadolivre.com.br/MLB...nd-f90-_JM

Holly molly... After I complain he said that could deal for 600 reals, instead of 1200 initially, and told that in general the problerm it's just in the rubber. It was 1200, to 990, to 600...He don't even know my technical issue, and want to push incomplete things. And I see complete rubber kits (88 keys fo digital piano), by much lower prices for sale.

That's why I developed buyphobia. Not just products use to have problems or lie about features, but sellers are horrible, trickers liers, repair are difficult to find with quality. Today I'm afraid of buy things.

Last edited by Beto-Music (11-12-2020 17:06)

Re: Help me clean the mess.

As far as the glue, you want an epoxy that is listed as safe for any plastic-to-plastic bond, which it should say somewhere on the bottle.  Find a small, hidden, unused area on the key you need to repair and put the tiniest amount of the epoxy onto that surface.  Wait a few hours or overnight, and if it hasn't damaged the key, it will be safe to use for the repair.  When making the repair, use as little glue as possible.

I'd avoid many of the Gorilla Glue or Superglue get-anything-to-stick-to-anything sorts of products, because those tend to have stronger chemicals that will denature the plastic since the company isn't sure what you will be gluing to what so they put in as many helpful ingredients as possible.  So products that have long lists of metal-to-plastic, metal-to-glass, glass-to-glass, etc. are may be more likely to harm your product than one that is plastic-to-plastic only (but that can also depend on the brand).  You can also learn a lot about what additives that could harm plastic are inside a product either from a google search; if you can't find a lot about ingredients look for something like an SDS data sheet about a product, which often have to list many or all of the ingredients even if the company considers that to be largely proprietary.

Spotify: https://open.spotify.com/artist/2xHiPcCsm29R12HX4eXd4J
Pianoteq Studio & Organteq
Casio GP300 & Custom organ console

Re: Help me clean the mess.

New update.

Well, the seller of Mercado Livre (a sort of eBay on ) confirmed it's the key sensor DPC with rubber, and not just rubber. It was a comunication mistake for one of his repplies.
A authorized technical assistance, in other city and (indicated by Roland), which also sells components, checked the sensor DPC for my  F-90, and said it ma y available just for 2021, since now it's not a vailable in my country. But he have how check rubber strips, and it's more affordable than with the other.

So I will wait... :-(  Maybe the price of a new set with them its just a few more costy than repair it with the technician on my city with skills to repair micro circuit boards.

I checked some prices of used Roland digital pianos. I found a good price for a Roland F-120 (younger and with more effects than my F-90), with SuperNatural engine, scapment Ivory Feel-G.

Is Roland's scapment nice  or useless to training   like ina real grand (in term of use scapmentfeeling like in real grand)?
Is Ivory feel of ROland really good, os just like something in between plastic and true ivory feel?
Is ivory feel (even if could be faintfull recreated with s ynthetics) desirable??? Most modern pianos have simple p´lastic keys...

Anyway I would only buy if I could sell my F-90, after fix it very well to work as good as new.

Last edited by Beto-Music (16-12-2020 01:50)

Re: Help me clean the mess.

Beto-Music wrote:

New update.

I checked some prices of used Roland digital pianos. I found a good price for a Roland F-120 (younger and with more effects than my F-90), with SuperNatural engine, scapment Ivory Feel-G.

Is Roland's scapment nice  or useless to training   like ina real grand (in term of use scapmentfeeling like in real grand)?
Is Ivory feel of ROland really good, os just like something in between plastic and true ivory feel?
Is ivory feel (even if could be faintfull recreated with s ynthetics) desirable??? Most modern pianos have simple p´lastic keys...

If I am not mistaken, I think it's the same action as in my FP-80 which I really like. I still prefer it to the newer Roland actions. FWIW, my wife, who is a trained pianist quite likes it too. The "ivory feel" refers to the texture of the keys (still plastic) which is less slippery than standard plastic keyboards found on many synths and digital pianos.

PT 7.3 with Steinway B and D, U4 upright, YC5, Bechstein DG, Steingraeber, Ant. Petrov, Kremsegg Collection #2, Electric Pianos and Hohner Collection. http://antoinewcaron.com

Re: Help me clean the mess.

Thanks :-)
I did a fast research and fround your FP-80 have Ivory Feel-S with double escapment.
F-120 have Ivory Feel-G, and I presume it haven't double escapment

I was aware of Ivory feel simulates Ivory characteristics you mentioned, but some reviews said it feels something in between plastic and true ivory, which can be a good thing, since real ivory it's not very good for glissando.

I would like to know what scapmenht emulation feels more real, the one from Roland or the one for Kawai. Just curiosity.

aWc wrote:

If I am not mistaken, I think it's the same action as in my FP-80 which I really like. I still prefer it to the newer Roland actions. FWIW, my wife, who is a trained pianist quite likes it too. The "ivory feel" refers to the texture of the keys (still plastic) which is less slippery than standard plastic keyboards found on many synths and digital pianos.

Last edited by Beto-Music (17-12-2020 00:28)

Re: Help me clean the mess.

Beto-Music wrote:

Thanks :-)
I did a fast research and fround your FP-80 have Ivory Feel-S with double escapment.
F-120 have Ivory Feel-G, and I presume it haven't double escapment

I was aware of Ivory feel simulates Ivory characteristics you mentioned, but some reviews said it feels something in between plastic and true ivory, which can be a good thing, since real ivory it's not very good for glissando.

I would like to know what scapmenht emulation feels more real, the one from Roland or the one for Kawai. Just curiosity.

Ah, sorry, I should have checked better. From what I read now, both G and S have escapement (they both belong to the PHAIII family), but S is considered superior (and in fact G was used in less expensive models). Of course, you should try for yourself if at all possible. As for Kawai vs Roland, it is mostly a matter of personal taste. I know Phil Best has said that recent Roland actions are closest to a Steinway action...FWIW.

PS Still a mystery to me, after reading through pages and pages of Roland specs (!): I still don't know if the PHAIII-Ivory S (like in my FP-80) is a Graded Hammer Action. It is not mentioned in the description of the FP-80 (and not FP-90 either) but it IS in the specs of its predecessor FP7-F. Could it be that they abandoned GHA starting with FP-80?

Last edited by aWc (17-12-2020 19:47)
PT 7.3 with Steinway B and D, U4 upright, YC5, Bechstein DG, Steingraeber, Ant. Petrov, Kremsegg Collection #2, Electric Pianos and Hohner Collection. http://antoinewcaron.com

Re: Help me clean the mess.

Even my Roland F-90 have graded hammer action. It's just about the bass being heavier than the middle range and the trebble be lighter than the middle range. I don't think they would ever abandon it. It's just about the metalic point of some hammers have some more mass by being taller than others, like shows the photo of my F-90's hamers.

PunBB bbcode test

If I was Roland's engineer, I would try to find a way to combine real wood key sticks with their hammer action with escapment.
I supose this is their best DP action:

PunBB bbcode test

But just some slin wood strips on the sides, instead of a full wood key.

By the way, a update, I found that new DCB for contacts would take 2 to 3 months to arrive if I order it with a Brazil Roland, by a authorized technical assistance service they gave me contact.

To wait or not to wait???
Or should I just let the tablet/cell phone micro soldering technician rebuilt the oxidated circuit lines?

aWc wrote:

Ah, sorry, I should have checked better. From what I read now, both G and S have escapement (they both belong to the PHAIII family), but S is considered superior (and in fact G was used in less expensive models). Of course, you should try for yourself if at all possible. As for Kawai vs Roland, it is mostly a matter of personal taste. I know Phil Best has said that recent Roland actions are closest to a Steinway action...FWIW.

PS Still a mystery to me, after reading through pages and pages of Roland specs (!): I still don't know if the PHAIII-Ivory S (like in my FP-80) is a Graded Hammer Action. It is not mentioned in the description of the FP-80 (and not FP-90 either) but it IS in the specs of its predecessor FP7-F. Could it be that they abandoned GHA starting with FP-80?

Last edited by Beto-Music (19-12-2020 16:00)